Think of these components as the skeleton of your suspension system; everything on the front end is attached or inserted to these components. Chances are they will all need some rehabilitation work before you reassemble them.
The Stub Axle:
 |
| Cleaned and Repaired Heinkel Sub-Axles |
I’m not even sure that’s what they are called; I’ve also heard them referred to as steering knuckles. Either way they are the items that at some level support the wheels, suspension and the brakes. Lots of things can wear or be wrong with these, so I’ve developed a checklist for you to follow:
Broken Shock Holder Studs: Sometimes the nuts holding the top of the suspension tower are so corroded you can’t easily remove them. The easiest thing to do is cut them off and then weld on new ones:
 |
| Shock top nuts can be difficult to remove, cut them off and weld on new 6mm studs |
 |
| New stud in position ready for welding |
Housing Cracks: The round steel suspension tower is press fit into the lower aluminum casting.
 |
| Chances are there’s a crack under the junk |
This can crack, so you need to carefully inspect the housing by removing all of the crud, paint, and corrosion that may be present. There are a few reasons this could crack;
- The suspension tower rusts and expands within the casting,
- The waterproof joint between the two pieces leaks and water freezes and expands between the components,
- There’s been some damage resulting from an accident or rough handling.
 |
| Welded aluminum spot on stub axle |
If you have a crack you need to fix it. Since it is a crack where two components of different metals join together, I was advised to bring it to a professional welder for repair. With my weekend welder skillset I deferred and got a few problems with it fixed for $30.
 |
| Blasted, transition joint filled with body putty, ready for painting |
Steering Bushing Removal: This isnt a problem per se, just something you need to do. The steering and tie rod bushings are easy to remove:
 |
| Remove steering bushings by burning the rubber, then sawing the outer ring |
Light the bushings on fire with a torch and burn out the middle, then use a hacksaw to cut the outer ring. After you cut the ring, tap it out with a punch.
 |
| Cut this ring with a saw and punch it out |
Steering Bushing Removal:: The old ones need to be removed and new ones inserted into place. You can remove the existing ones by cutting and tapping them out, but to be honest it is much easier to send them to a machine shop and have them do the removal, replacement, and reaming of the new bushes.
Subaxle Crank Bushings: You should check these to make sure they do not appear worn. The axle only moves a bit inside this bushing, and sometimes you can see how the roller bearings have worn right into it. Otherwise this area will be full of old grease and should be cleaned.
Painting: I’ve had three complete axle setups and they’ve all been painted (or not painted) differently. Two have had the casting unfinished and the suspension tubes painted black. One had the whole assembly painted silver. I decided to paint everything silver. On my last car I painted the suspension towers black and left the casting unfinished.
The Axle:
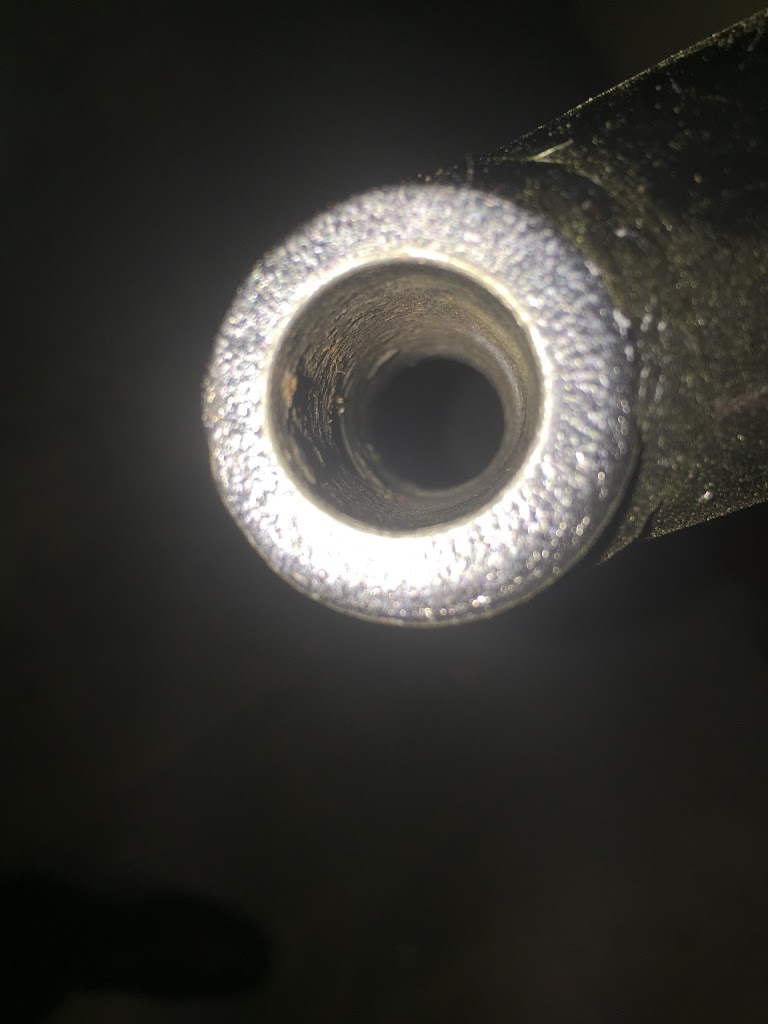
Not much rehab work is required here. First thing to do is make sure the axle hole is clean enough to receive the kinpins.
 |
| This axle hole needs to be cleaned out before reassembly |
You should also verify that the axle holder pins fit in the holes in the kingpins. The German Club kingpin holes are larger than the retaining holes on the new English Club pins. If you are using English kingpins you will need to trim the diameter of the pins to fit.
 |
| English kinpins have holes that are too small for the pins |
 |
| You need to reduce the size as shown |
In the next post we’ll cover reassembly.
This Article is © 2012-2014 Heinkel Cars, Kabines, and Cabin Scooters. All Rights Reserved.